Friday, July 23, 2010

South African theme

We had a world cup theme in the office for an upcoming event and my team was assigned South Africa. If there's one thing I love about my current company, it's the abundance of such talented & creative minds. They've put together a photo shoot as part of the pre-activities and I was tasked to do some of the makeup.

The inspiration for the first look came from Naima's photo on America's Next Top Model. But in my model's case, I opted to skip the black color on the cheek plane since the facial features didn't seem to fit it, as seen in this behind-the-scene photo. 

 
Or maybe I just couldn't figure the strategy for applying it. Anyway, I erased it eventually and here's the tight shot that was taken later on.

I also realized that I should always finish the contouring/blush first before drawing patterns on the skin. I had such a hard time dusting colors on the cheeks after I made the dots so it wouldn't smear the kohl pencil. 

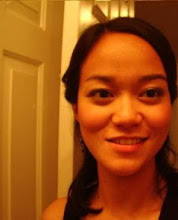
Then I did another look. This time, I used plums on her eyelids and tried to make it smokey, with heavy false eyelashes and a thick eyeliner. For the coverage, we were opting for a dark skin shade with pale lips. 

I'm so happy with how this photo shoot turned out. It's my first time to do it for fun, without considering the time limit or how the output would affect my grades. I'll definitely do more of this in the future with my aspiring photographer friends who are also trying to beef up their portfolio. =D

Saturday, July 17, 2010

Back from hiatus!

It's been a while since I applied makeup on anybody. After my Saturday classes ended in May, I had no other venue to practice my skills. I guess I was a little bummed out too that it would take my school an entire month just to deliver our grades. So back then, I didn't know if I should be ecstatic or not because I wasn't sure I qualified for the basic makeup certificate yet. But I was informed that since I was being invited to internship opportunities for the school's events, that means I practically passed the course already and I just need to complete the required on-the-job training hours before they hand out my grades & certificate. Woohoo!!!

This past week was a special one to me. I helped my friend with her makeup for another friend's wedding where she was one of the bridesmaids.

Then I also had a chance to participate in FHM's 100 Sexiest Women victory party last Thursday at the World Trade Center. This was part of my internship requirement and I did the makeup of one of the belly dancers. Here was the peg for her look.


I had a difficult time with the eyeliner. First, I used the felt-tip type (L'oreal Super Liner) but it kept cracking on her upper lashline. That's when I realized I can never use this product on chinita eyes because the inner folds on the eyelids tends to break the layer of makeup. To fix it, I need a smooth surface that won't rub against the skin so I used a gel liner instead and set it with black powder eyeshadow afterwards.

Monday, May 24, 2010

My 1st photo shoot... whew!

So I'm finally done with my classes but I still don't know if I qualify for the certificate or not. My school will only release the grades a month after and we also have to complete the required OJT hours. I have no clue yet how to book work for that. Yikes!

But on a lighter note, I want to share my photo shoot results. This day was super stressful for me. I was standing for several hours straight and had some back pain by the end of it since my model's chair was too low for me.

Bridal
Glam

Barbie

Smokey Eyes

Old Hollywood

At this point, I'm not yet ready to be a professional makeup artist. There's still plenty of training & practice for me to do before I become even good enough to compete in the market. I actually plan to take more classes in the near future. There's no backing out for me anymore =)

Monday, May 3, 2010

Period Makeup: 1970-1980

The inspiration for the 1970s look was disco queen. I used heavy eyeliner and frosted eyeshadow to highlight the brow bone. One thing I learned from this session was to always use a hint of yellow foundation with very fair skinned girls, like my model. When the lightest shade I had was still too dark for her, I mixed that with white to get the closest skin tone. But when I applied it on her face, it turned out too white and I had to diffuse it with yellow-based powder so her neck & face would match perfectly. My model had a trained eye with scrutinizing makeup too so I had a lot of help with correcting the flaws on my application. Heehee :)

Before

After
I was so happy on this day because it was the first time my teacher praised my work, ever! She said my blending was improving. That comment shot me straight to heaven! =D

Later during the day, we tried to recreate the 80's punk look with dark eyes and very pale lips. I mixed foundation with petroleum jelly to lighten the lips.

Before

After

I think her eyes were still not dark enough in this look. It's still a very soft smokey eye. I didn't have enough time to apply more actually. So that's another thing I need to work on, SPEED!

Thanks Kars & Amy for trekking to Makati to be my models. I know you girls live quite far from it :)

Period Makeup: 1940-1960

Ok, it's been ages since I last blogged about my classes. Haha, been quite busy with my real work these past few weeks but now that things started to ease up a bit, I have time for makeup once again! Here, we did 1940's makeup. The eyebrows were made thick & full on purpose, then paired with the signature bright red lipstick and neutral eyeshadow swept upwards on the outer corner.

Before

After

In the afternoon, we did 1950s & 1960s makeup. I still find false eyelashes so tricky! In here, I forgot to curl her lashes first before applying the falsies. Major booboo there because she had lashes in 2 directions at the end of it.
Before

After (also full eyebrows)

Closed Eyes (check out the beauty mark! =p)

Then for the 1960's Twiggy look, I didn't have falsies short enough to work on her bottom lashes so I just drew some lines to achieve the same effect. Another challenge I had here was that the left falsies didn't flare evenly. I'm not sure if it was with how the lashes were made or with the way I handled & glued it on the lash line. I definitely need more practice!


Thanks Loren & Aina for being my models on this day =D

Saturday, April 10, 2010

15 Looks

I've been practicing non-stop for the past 2 weeks for my 15-looks assignment which I'm turning in today. Lugging around my heavy mallet to and from the office then staying late after work became my routine just to finish it all. I even had to redo some looks several times, especially the smoky eyes because it's really hard to get it right. Despite the stress and not-so-perfect results, I'm happy because I didn't think I'd have enough time or models to work on. Thank you so much to all my friends who readily let me put makeup on them! =D

No Makeup

Bridal

 Smoky Eyes (gray, green, blue, brown, plum)

Girls, please let me know if you want a copy of a photo that wasn't shown here. I did more than 15 & had other models but I tried to limit the post to only what I passed so it won't look as cluttered =p

Sunday, March 28, 2010

Period Makeup: 1920-1930

In my last class, we learned to recreate looks from the 1920's and 1930's. This comes in handy once we're on the field already and are asked to do makeup for photo shoots & events inspired by these eras. Here's my friend Jade again for the 1920's.

Before

After

Haha, does it look like she really is from that period? I converted the image to black & white because I wanted to see if the lip color was dark enough to register as black on photo. Because the eyebrows from these eras were mostly thin, we used a wax to smooth out the hair and applied foundation over it. But because I didn't have a sealant, the strands started to pop out when I was almost done with the entire application. I also made her lips smaller here by exaggerating the cupid's bow.


And here she is back in present day with her regular eyebrows. The look became wearable once I removed the wax. Thanks again dear for letting me practice on you! =D

Now for the 1930's, I didn't have a friend available so I just got a random girl from the building to be my model =p

Before

After

Closed Eyes

I really saw the difference when I used sealant on her eyebrows after putting wax. The area stayed smooth even after I was done with her makeup! The only booboo here was that the foundation was too dark so it was still quite noticeable in the photo. I also altered the natural shape of her lips by adding a wide V in the upper middle part. Unlike the 1920's lips, this version doesn't dip as sharply in the cupid's bow and the entire lip looks fuller and more round.

Thursday, March 25, 2010

From No Makeup to Bridal

This was a nerve-wrecking afternoon. Hehe, we were under a time limit and did 2 looks on 1 model. First was the no-makeup makeup where the face needs to look fresh & clean with no visible traces of the product. They say this is one of the hardest looks to master.
 
Before

After (no makeup look)

Then we moved on to bridal makeup where you use neutral but intensified colors. I also got to apply false eyelashes for the first time. Wee!!! Thanks Grace for spending the afternoon with me! I hope you enjoyed it as much as I did :)
 
After (bridal look)

Closed Eyes
Lessons Learned
- If the color of the foundation still doesn't match the skin perfectly after application, adjust it by dusting a darker or lighter shade of powder. There should be no difference at all between the face and the neck.
- Stick to the apples of the cheeks when applying blush and make sure not to extend it too much inward when blending. Otherwise, it can look like your model is having allergies instead of the natural flush on the cheeks that you were going for.
- When buying falsies, get a pair that looks natural and isn't too thick. In my case, the lashes were too long and it overwhelmed the entire face. Once my model opened her eyes, I couldn't see the eye shadow anymore even though I blended it up to the crease.
- Always set the look with powder after all the makeup's done. Then check from time to time if the t-zone is already starting to become oily and blot/retouch if necessary.

Makeup for Weddings

Over the weekend, we were asked to bring in 3 models in class: a little girl, a man and a mature woman. Being a makeup artist doesn't mean you'll always work on women in their 20's or 30's. Our teacher also wanted us to understand how the application becomes different for other folks. This happens a lot during weddings with the flower girls, the groom and the mothers of the couple. Kids aren't supposed to look made up and shouldn't look like tiny adults in these occasions. Men shouldn't look like girls either and mature women need age appropriate colors and moisturizing products on their face. For this session, I tagged along my aunt, niece and boyfriend. It was already a family affair on its own! ;p


All Dolled Up: Smoky Eyes

Last week, I decided to always bring my makeup kit every Thursday so I can practice on my office mates after work. Rain was my first victim. Hehe. I tried the smoky look on her because I wasn't able to do this the last time in class. I love how the dark eyeshadow opened up her eyes. I also realized that smaller brushes definitely come in handy for chinitas like her because it helps me control the color blending on her eyelids.

 
 Before

 
After